hexo 搭建
安装 nodeJs
1
2
| 1. 下载安装 nodejs
2. 设置淘宝镜像: npm config set registry=https://registry.npm.taobao.org
|
安装 hexo
1
2
3
4
| 1. 安装 hexo npm install -g hexo-cli
2. hexo init "目录名"
3. hexo g (开发配置时先执行下 hexo clean 操作)
4. hexo s 访问 http://localhost:4000
|
hexo 部署 Github
###创建密钥对
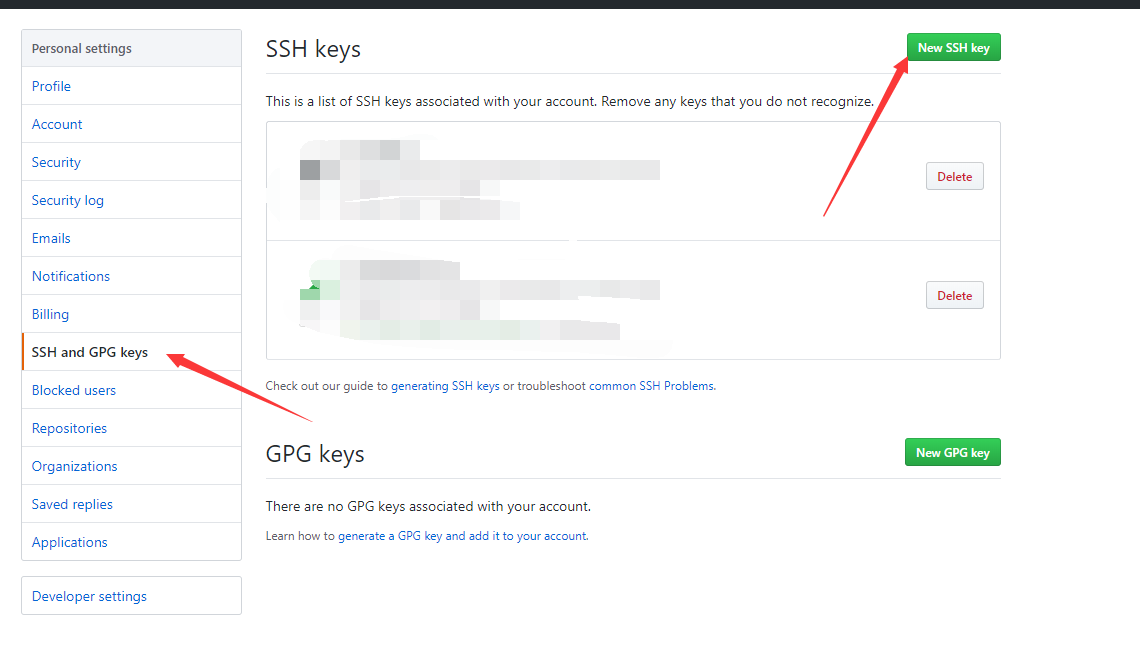
为了方便运行 GitHub Actions 时登录 GitHub 账号,我们使用 SSH 方式登录。就是要把设备的私钥交给 GitHub Actions,公钥交给 GitHub,需要去 Settings 里去配置。
1
2
| ssh-keygen -t rsa -C "Github 的邮箱地址"
如 ssh-keygen -t rsa -C "123123123@gmail.com"
|
密钥对生成后默认的位置是用户文件。以 windows 为例:密钥对文件在 C:\Users\用户名里,其中 Users 可能因为系统原因显示的是用户。这个文件夹里会有一个。ssh 的目录,这个里面就是我们的密钥对。
其中 id_rsa 是私钥,id_rsa.pub 是公钥。
创建仓库
1
2
3
| 创建一个公有仓库,命名必须为 username.github.io (username 为自己 GitHub 账号)
创建一个私有仓库,随意命名 (将 hexo 的源代码上传到此仓库)
|
创建 Github Action
进入仓库 Actions->new workflow
1
2
3
4
5
6
7
8
9
10
11
12
13
14
15
16
17
18
19
20
21
22
23
24
25
26
27
28
29
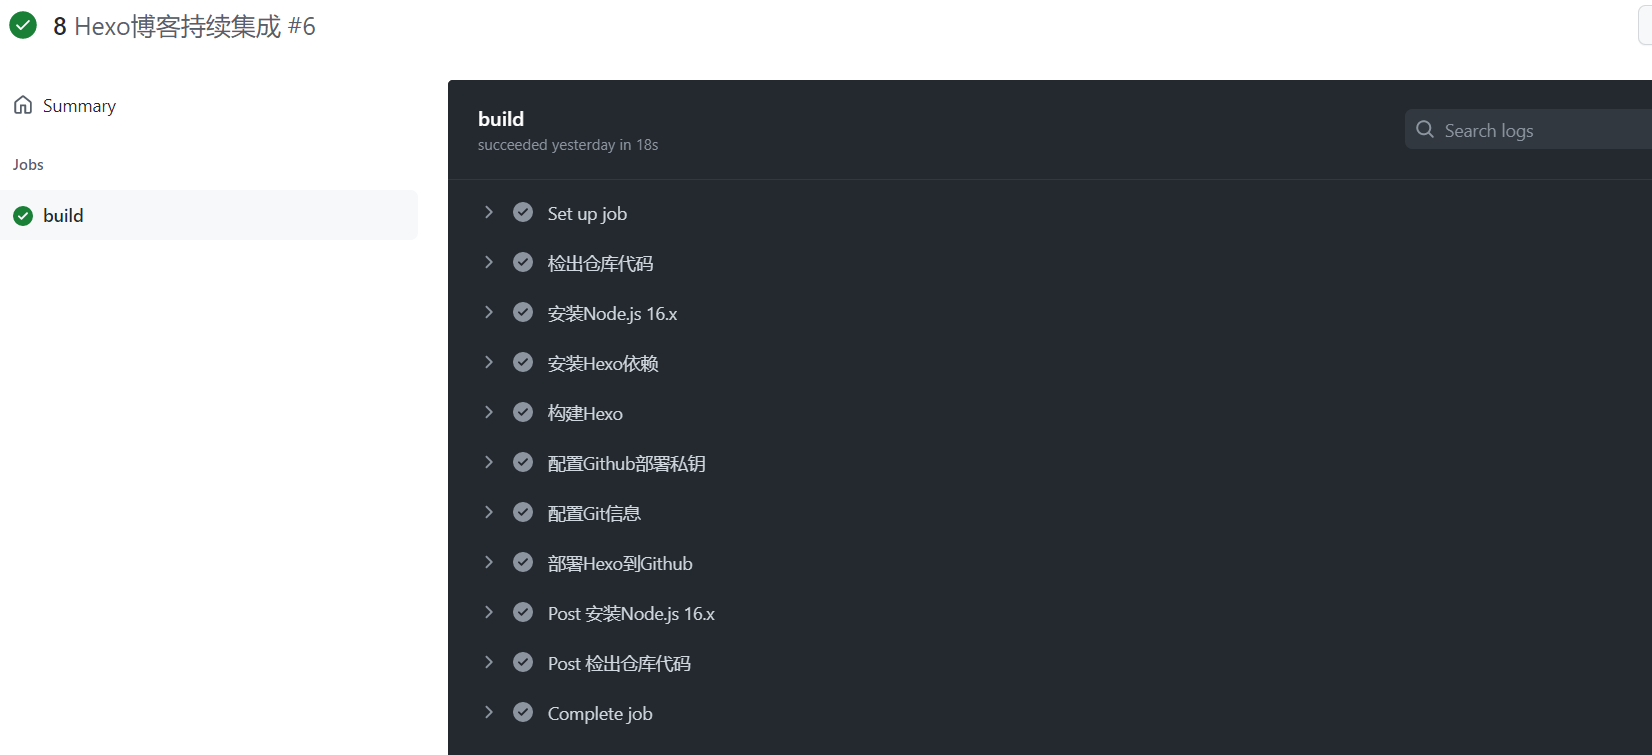
| name: Hexo 博客持续集成
on:
push:
branches:
- master
jobs:
build:
runs-on: ubuntu-latest
steps:
- name: 检出仓库代码
uses: actions/checkout@master
- name: 安装 Node.js 11.x
uses: actions/setup-node@master
with:
node-version: "11.x"
- name: 安装 Hexo 依赖
run: |
npm install hexo-cli -g
npm install
- name: 构建 Hexo
run: |
hexo clean
hexo generate
|
👆上面 nodeJs 版本需要与本地对应
配置部署到 Github.io 仓库
1
2
3
4
5
6
7
8
9
10
11
12
13
14
15
16
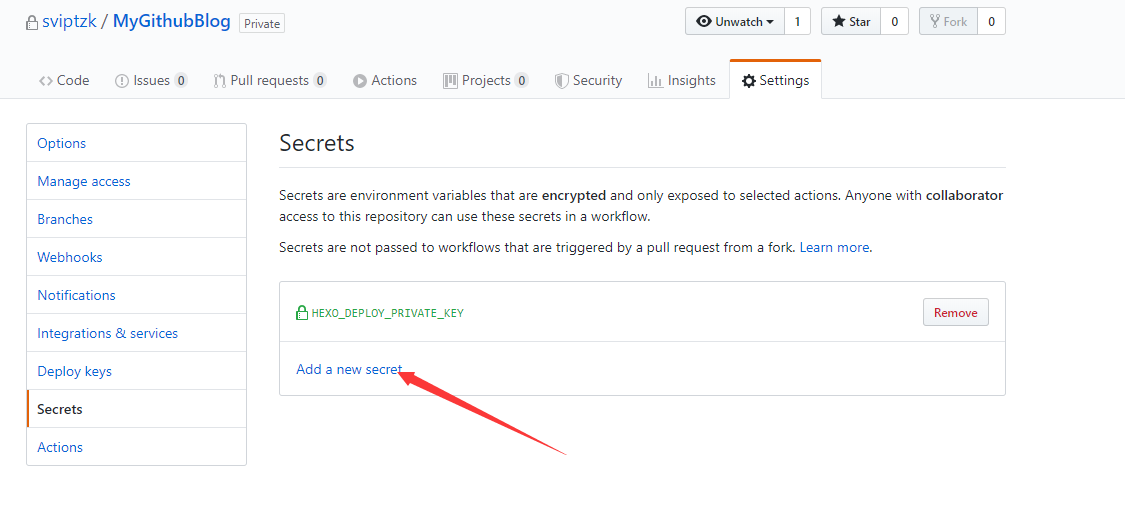
| - name: 配置 Github 部署私钥
env:
HEXO_DEPLOY_PRIVATE_KEY: ${{ secrets.HEXO_DEPLOY_PRIVATE_KEY }}
run: |
mkdir -p ~/.ssh/
echo "$HEXO_DEPLOY_PRIVATE_KEY" > ~/.ssh/id_rsa
chmod 600 ~/.ssh/id_rsa
ssh-keyscan github.com >> ~/.ssh/known_hosts
- name: 配置 Git 信息
run: |
git config --global user.name '名称'
git config --global user.email '邮箱'
- name: 部署 Hexo 到 Github
run: hexo deploy
|
保存之后进到私有仓库的 Github Action 可以看到编译流程,查看是否运行成功。
hexo 开发
推荐使用VSCODE开发,插件多。
hexo 疑难解答
文章右侧的目录功能不能跳转
参考文章
https://blog.ctftools.com/2021/07/newpost-18/
https://cloud.tencent.com/developer/article/1611808
https://hexo.fluid-dev.com/docs/guide/
https://www.bilibili.com/read/cv12633102